|
Jupyter at Bryn Mawr College |
|
|
| Public notebooks: /services/public/dblank / CS110 Intro to Computing / 2017-Fall / Notebooks | |||
1. Image Functions
1.1 Using Images in your Code
This is an easy way to make your creations look better.
- get an image into your folder
- upload a picture
- use %download
- include the name in a special comment in your sketch
- use loadImage()
%download http://www.spongebobvitamins.com/images/spongBob.png
/* @pjs preload="spongBob.png"; */

PImage img;

void setup() {
    img = loadImage("spongBob.png");
    size(img.width, img.height);
}

void draw() {
    background(0, 128, 0);
    image(img, 0, 0);
    noLoop();
}
/* @pjs preload="spongBob.png"; */
// added comment

float g = 9.8;

float vx;
float vy;

float x;
float y;

float dt;
float t;

PImage img; // added global

void setup() {
    img = loadImage("spongBob.png"); // added loadImage
    size(200, 500);
    x = width/2;
    y = 50;
    dt = 0.1;
    t = 0;
    vx = 5.0;
    vy = 0.0;
}

void drawBall(float x, float y, float scale) {
    //fill(255, 0, 0);
    //ellipse(x, y, 10 * scale, 10 * scale);
    image(img, x - 15, y - 15, 30, 30); // added
}

void draw() {
    background(0, 0, 128);
    // gravity
    vy = vy + g * dt;

    float dx = vx * dt;
    if (((x + dx) > width) || ((x + dx) < 0)) {
        vx = vx * -1;
    } else {
        x = x + dx;
    }

    float dy = vy * dt;
    if (((y + dy) > height) || ((y + dy) < 0)) {
        vy = vy * -1;
    } else {
        y = y + dy;
    }

    drawBall(x, y, 1);

    t = t + dt;
}
1.2 Pixel-based Drawing
First, let's draw an image that we create:
PImage img;

void setup() {
    size(500, 500);
    img = new PImage(200, 300, RGB);
}

void draw() {
    background(128);
    image(img, 0, 0);
    noLoop();
}
We know that we can create shapes using the built-in Processing functions like rect(). But what are they doing at the deepest level? Could we do it ourselves?
PImage img;

void setup() {
    size(500, 500);
    img = new PImage(500, 500, RGB);
}

void draw() {
    myrect(10, 20, 200, 200, color(255, 0, 0));
    mycircle(300, 300, 75, color(0, 255, 0));
    image(img, 0, 0);
    noLoop();
}

void myrect(int x, int y, int w, int h, color c) {
    img.loadPixels();
    // what would go here?
    img.updatePixels();
}

void mycircle(int x, int y, int radius, color c) {
    img.loadPixels();
    // what would go here?
    img.updatePixels();
}
Yes, we could. All we need to do is change the pixels ourselves, like this:
PImage img;

void setup() {
    size(500, 500);
    img = new PImage(500, 500, RGB);
}

void draw() {
    myrect(10, 20, 200, 200, color(255, 0, 0));
    mycircle(300, 300, 75, color(0, 255, 0));
    image(img, 0, 0);
    noLoop();
}

void myrect(int x, int y, int w, int h, color c) {
    img.loadPixels();
    // what would go here?
    for (int i=x; i < x + w; i++) {
        for (int j=y; j < y + h; j++) {
            img.pixels[i + j * img.width] = c;
        }
    }
    img.updatePixels();
}

void mycircle(int x, int y, int radius, color c) {
    img.loadPixels();
    // what would go here?
    for (int i=x-radius; i < x + radius; i++) {
        for (int j=y-radius; j < y + radius; j++) {
            if (dist(x, y, i, j) < radius) {
                img.pixels[i + j * img.width] = c;
            }
        }
    }
    img.updatePixels();
}
BONUS PROBLEM 1:
Try to draw a line, like:
void myline(float x1, float y1, float x2, float y2) {
    // handle vertical line
    // handle horizontal line
    // handle the other cases
}
1.3 Image Flipping
1.3.1 Horizontal Mirror
For this demonstration, I'll use this picture of a student:
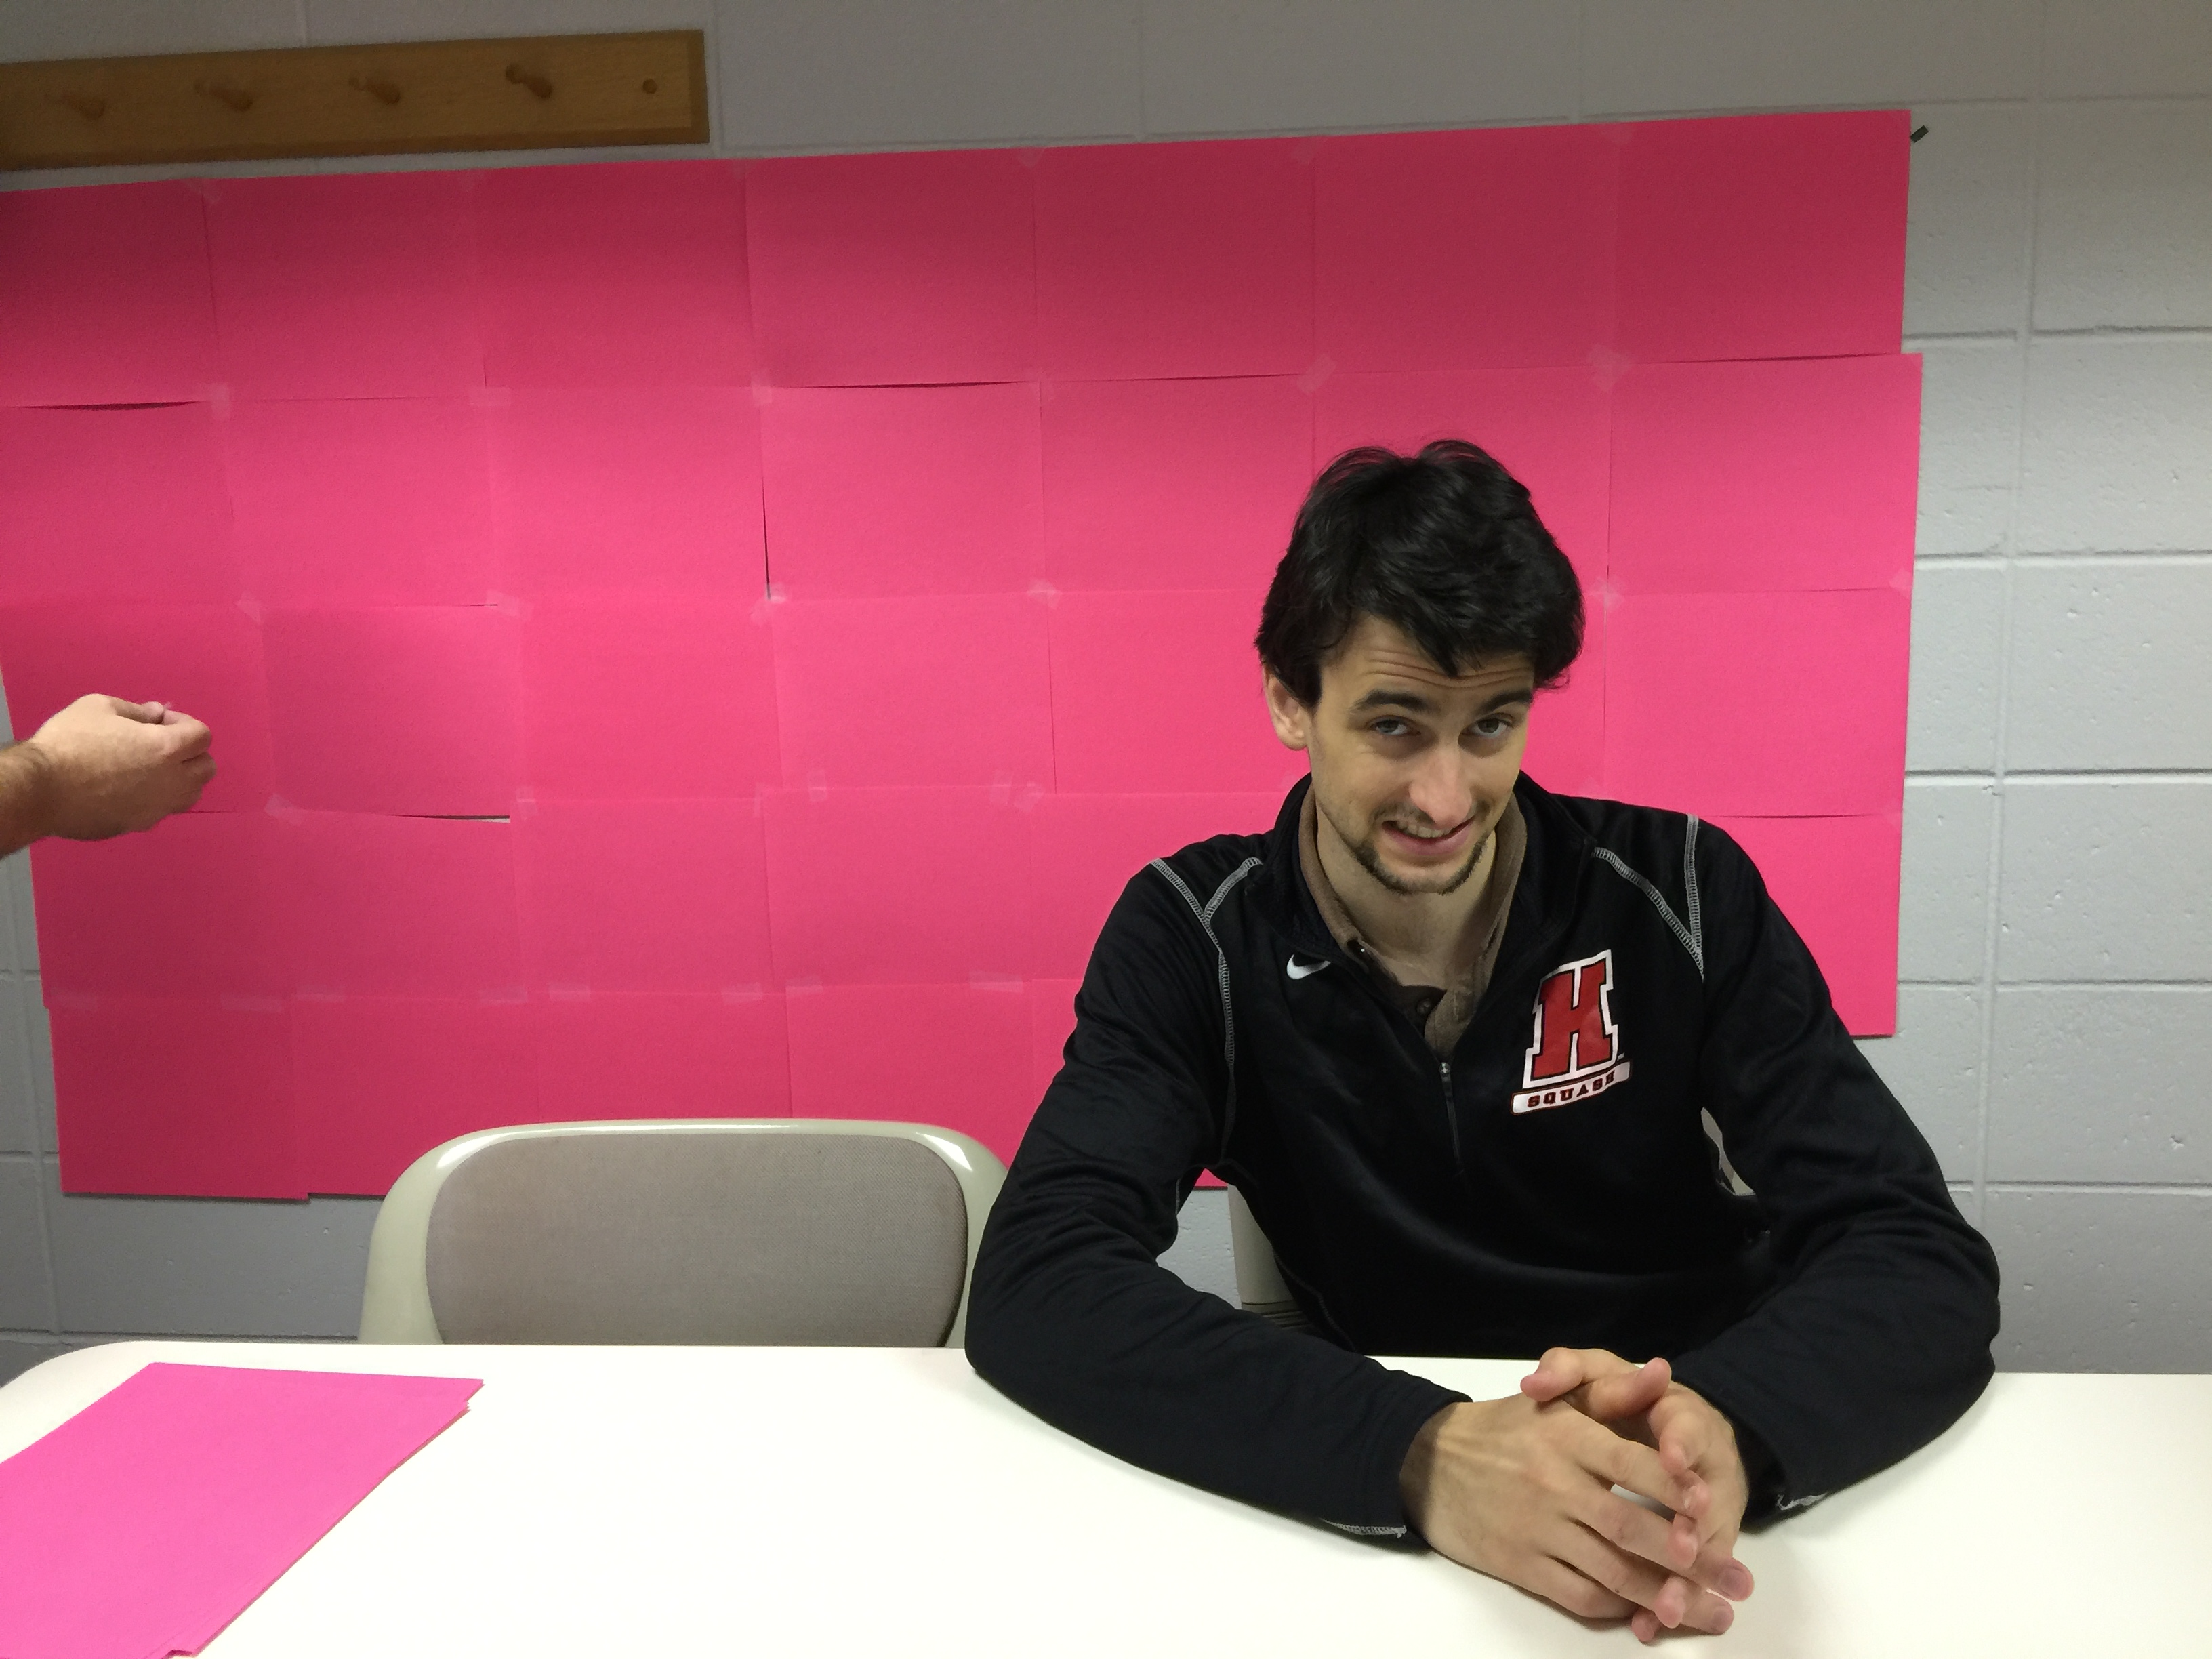
You can download it, and upload it yourself, or use:
%download https://jupyter.brynmawr.edu/services/public/dblank/CS110%20Intro%20to%20Computing/2017-Fall/Notebooks/IMG_4688.jpeg
First, let's just test it and display it:
/* @pjs preload="IMG_4688.jpeg"; */

PImage img;

void setup() {
    img = loadImage("IMG_4688.jpeg");
    img.resize(int(img.width/20), int(img.height/20));
    size(img.width, img.height);
}

void draw() {
    image(img, 0, 0);
    noLoop();
}
Next, let's flip it so that everything on the right is on the left and everything on the left is on the right.
To do that, we just map the pixels so that the pixels in the first column (zero) will now be in the last column (img.width - 1):
/* @pjs preload="IMG_4688.jpeg"; */

PImage img;
PImage result;

void setup() {
    img = loadImage("IMG_4688.jpeg");
    img.resize(int(img.width/5), int(img.height/5));
    size(img.width, img.height);
    img.loadPixels();
    // Create a result from img:
    result = new PImage(img.width, img.height);
    result.loadPixels();
    for (int y=0; y < img.height; y++) {
        for (int x=0; x < img.width; x++) {
            color c = img.pixels[x + y * img.width];
            result.pixels[img.width - 1 - x + (y * img.width)] = c;
        }
    }
    result.updatePixels();
}

void draw() {
    image(result, 0, 0);
    noLoop();
}
BONUS PROBLEM 2:
Flip student upside down.
1.4 Blue Screen, er Pink Screen
/* @pjs preload="IMG_4688.jpeg"; */

PImage img;

void setup() {
    img = loadImage("IMG_4688.jpeg");
    img.resize(int(img.width/5), int(img.height/5));
    size(img.width, img.height);
    img.loadPixels();
    for (int y=0; y < img.height; y++) {
        for (int x=0; x < img.width; x++) {
            color c = img.pixels[x + y * img.width];
            float r = red(c);
            float g = green(c);
            float b = blue(c);
            // 201, 59, 98
            if ((190 < r && r < 250 &&
                 55 < g && g < 90 &&
                 90 < b && b < 150)) { // ||
                //...
                img.pixels[x + (y * img.width)] = color(0, 255, 0);
            }
        }
    }
    img.updatePixels();
}

void mousePressed() {
    color c = img.get(mouseX, mouseY);
    float r = red(c);
    float g = green(c);
    float b = blue(c);
    println("RGB: " + r + ", " + g + ", " + b);
}

void draw() {
    image(img, 0, 0);
    noLoop();
}
BONUS PROBLEM 3:
Make as much as the pink area turn green without anything else turning green.